So I actually made two cakes last week. I showed a friend here how to make the Lego cake. Then I made a cake for Melanie's baby shower. I found the little teddy bear mold from Wilton and made one to show Melanie. She liked it so I decided to use it for her shower cake. First, I made a base cake. She wanted a marble cake so I got a Fudge Marble mix and then covered the 13x9 with white fondant.
Next I made the two teddy bears. Since I couldn't really marble the bears I made one Yellow and the other Chocolate Fudge. I had forgotten to take pictures of them until they were half frosted. JR called about that time and insisted that I take pictures of the process because he likes to see them. Here are the bears with just black icing.
The bears weren't complicated or difficult, but they took a lot longer than I expected. My original plan was to have at least one of them holding a baby blanket. I would post a picture of the cake that gave me the idea, but Blogger won't let me. It's called "Off to Dreamland" on the Wilton website. But when I realized how long it took to frost them, I decided it wasn't worth it to try to figure out the blanket. I didn't want to get to the shower with an unfinished cake because I started a project that was too big. If I had done it before and knew what I was doing, maybe, but I would have been figuring it out as I went and didn't want to give Melanie an ugly cake. A simple-looking cake I could handle.
I did try something else that was new, though. I tried to paint the fondant. I made little balls of fondant and marked lines on them with a toothpick. I then used a brush and food coloring to paint them just like I had read about online. Unfortunately, I did not do enough research first. The food coloring doesn't dry on its own. You have to mix it with alcohol and then let it evaporate out. It takes all the moisture with it so it looks like you've painted with water colors. I went to the Shoppette to buy a small (i.e., hotel fridge sized) bottle of vodka because I know vodka dries odorless. I don't know about other alcohols so I wanted vodka. What I learned was that they don't sell little bottles of alcohol here. They only sell big ones. I didn't want a huge bottle of alcohol in my house so I just decided to do something else. I kneaded the balls until the colors blended together. Here's what they looked like while I was painting them.
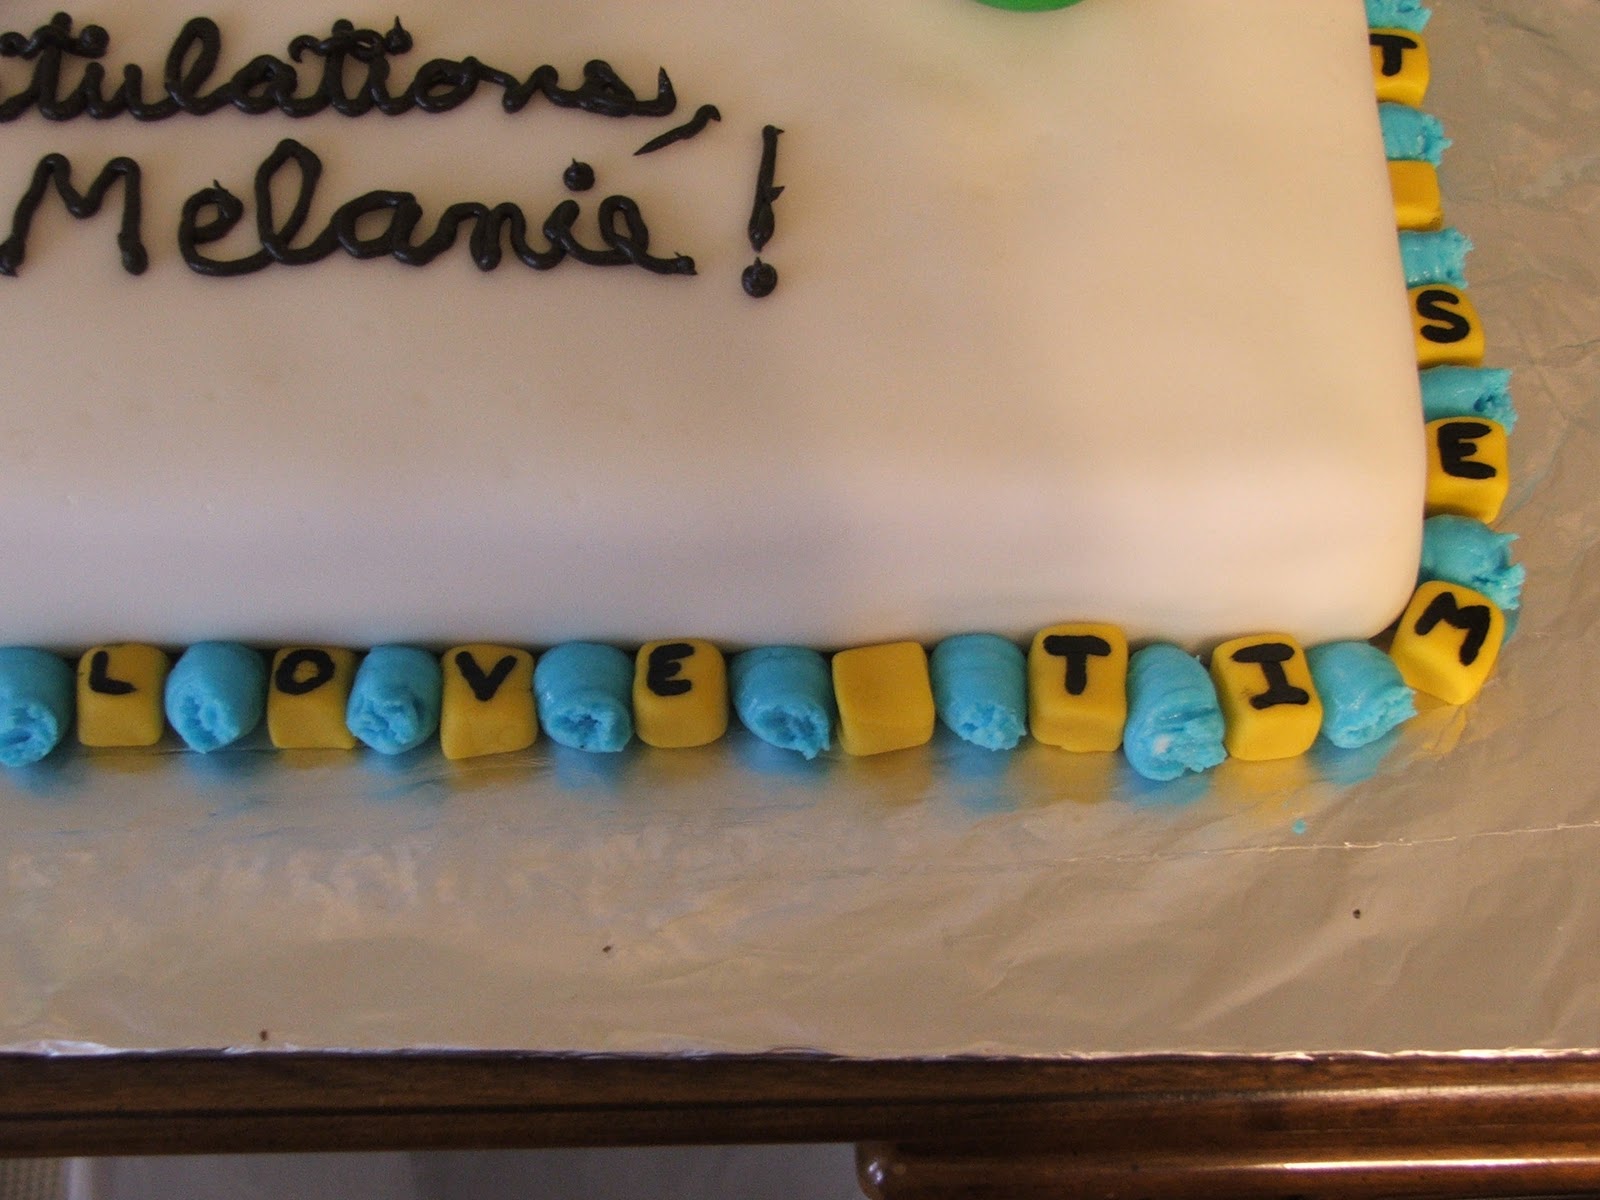
For the border around the bottom I made some of the letter blocks, but again, because of the paint drying problem, I didn't put letters on all of them. I also made two larger blocks to go on the top of the cake. Melanie and Victor, at that point, still hadn't decided on names for the boys. The doctors call them "Baby A" and "Baby B" so those were the letters I put on the big blocks. While I was at the BX (base exchange) I saw a picture frame that said, "Twins are love times two." I thought it was cute so I wrote that on the little blocks around the bottom. Between the blocks I piped some buttercream frosting.
Here's the finished cake:
Congratulations, Melanie! (and Victor!)
Adventures of the Norris family (one of them, at least), currently set in Okinawa, Japan
Wednesday, November 24, 2010
Smart, Talented, and Blessed Boys
Zane drew this picture this morning. It looks like what he says it is. This is a "Sun Person" standing on a "clump" (which he says means "dirt") and jumping rope. It amazes me some of the things he comes up with when I've given him absolutely no direction. He's definitely got his daddy's creativity (and randomness).
Nat has started showing some analytical skills. He sits in the play area and explores the toys. When I took this picture he was sitting at the "bang, bang," as Zane called it, and was slowly pushing the pegs in and pulling them out over and over again. JR pointed out to me that the colored pegs were placed symmetrically. I think that means someone else has inherited his parents' OCD tendencies.
JR graduated this week from the first portion of his school. He had the highest score in his class, but due to a technicality, he is not the Honor Graduate. I'm proud of him for having the highest score, though. He apparently has some nice guys in the class with him. When this guy found out JR was going to be alone for Thanksgiving he told JR to load his bike in the guys truck and then took him home to Quantico for Thanksgiving. I'm so thankful that there's someone there to take care of him and that he won't be alone! I love blessings!
Friday, October 15, 2010
Nat's First Birthday
Here are some pics of Nat with his first birthday cupcake. At first he just looked at it. "Mom, what is this thing? What am I supposed to do with this?" He figured it out, though.
Saturday, October 9, 2010
Cake 4 - Star Wars a.k.a. Some Lessons Learned
So I learned a lot of lessons with this one. I was told to make a Star Wars cake. I couldn't be chocolate or lemon and was supposed to have cream cheese icing. It also had to use these Star Wars toys.
I gave some suggestions, and Sharon (the mom of the birthday girl) chose red velvet cake. I started by baking two 15x11 red velvet cakes. I cut off a little of one of the sides and put it on the end to make it a long, narrow cake. I then iced it very thinly to keep the crumbs in. Lesson 1: I don't like red velvet cake. It turned everything red! It washed right off, but it was annoying. I, stupidly, was afraid it would dye everything red. It didn't. It also didn't transfer well. I don't know if it's just drier or what, but the top layer cracked to pieces when I put it on the lower level. I had to do some careful piecing to get it all flat. (It was that or make a whole new one at 9 p.m.)
Next I made a two-layer round cake and iced it just like the 15x11. It turned out much better.
Here I got distracted and forgot to take more pictures of the process. So you just get to listen to me describe it all. I separated the icing into different portions. I dyed some light blue, some dark blue, some gray, and some green. Half the 15x11 (which was not really those dimensions anymore) was iced in white, just thicker than before so it would actually cover the red cake. The other half was covered in the lighter green icing. The round cake was three different colors. I made half the side white and the other half light blue. The top was dark blue (it actually turned out kind of purple, but it looked okay once it set). During this icing process I learned Lesson 2: I don't like cream cheese frosting. It gets too soft too quickly. It's a pain to make it do what you want. It wasn't awful, just not as easy as buttercream. I also learned Lesson 3: Black food coloring gives everything a slightly purple tint. If you want black, you need to put cocoa or something in the icing too. I'm told that when it dries the light purple will turn gray. I think it still looked purple, but I also saw it before it dried so that might have skewed my view.
The round cake was placed on top of the sheet cake with the white sides together. I added details to the lower cake by using black piping gels to draw a doorway on the white so it looked like the inside of a ship where the Storm Trooper Commander Fil could fight Obi-Wan Kenobi. On the other side I put in some French Vanilla Piroulines. I leaf tipped some leaves on the Piroulines so they would look like trees. I then stuck Anakin Skywalker and Stap into the grass so it would look like he was flying through that world where the Ewoks live (with a few less trees, obviously). On the top of the round I placed a plain Hershey bar that had been iced gray to make a platform across the middle of the cake. Then I put white lines on the dark blue to make the scene where Luke fights Darth Vader. Sorry I don't have a picture of this. I really should have taken one.
To cover the seem in the middle of the cake where the colors changed, I made a sugar cookie in the shape of the Star Wars logo. I made it the size I wanted it. I forgot it would expand in the oven. Here's what the huge thing looked like.
I iced the letters to make them stand out a bit, then I propped it in front of the cake with a small piece of cake board to help keep it from cracking. Here's the finished cake. You can't really see any of the details behind the mammoth cookie. Sorry again.
So I learned a lot. I don't like red velvet. I don't like cream cheese frosting (at least not for decorating). I don't like black food coloring. I did enjoy making the cake, though, if for no other reason than I learned a lot. Now I know, right? Besides, Stevie liked it, and that's all that really matters.
Update: Here's a link to Sharon's blog. She has a couple better pictures of the cake.
http://werewildwithpottywords.blogspot.com/2010/10/birthday-baby.html
Thursday, September 23, 2010
My Silly Boys
The other day I decided to be nice and make muffins for breakfast. I made orange muffins with chocolate chips in them. I thought the orange needed to be stronger. Apparently Zane liked them.
This morning JR got Nat out of his crib, as I was already downstairs when he woke up. Nat has this thing where if he's playing and finds a pacifier, he will spit out the one in his mouth in order to have the new one he found. He's changed his MO. Now he just uses them both at the same time.
My boys are silly. I'm going to claim they get it from their father. It's not like he makes that hard to believe.
Tuesday, September 21, 2010
My Talented Boy
Zane has been asking for play dough lately. I let him have some the other day, and the first thing he did was copy his rolling pin. Then, without direction, suggestion, any promptings whatsoever, he created this.
It was completely his creation. I'm so proud of him. He has definitely inherited some of his daddy's artistic abilities.
Wednesday, September 1, 2010
Typhoon Kompasu
I planned on taking more pictures to let you all know what we experienced with our first typhoon. I didn't actually take any more pictures, but there wasn't really any reason. Through the whole storm we had no lightning and no thunder. There was plenty of wind and rain, but that was it. It was no worse (in fact, it was easier) than some of the "normal" storms we've had. Don't get me wrong, I'm not wishing for a huge storm with all the accompanying damage or anything like that, it was just kind of pathetic after all the hype. Oh well. I did enjoy JR being home all day. It about drove him crazy, but I like getting to spend some time with him, especially since he'll be leaving soon for 3 months.
Summary: We're all safe, and life is back to normal today. Hope you all have a good one as well!
Tuesday, August 31, 2010
There's a typhoon coming? Part 2
Last night the radio said the storm would hit us at 7 a.m. Well, it's 7 a.m., and here's what it looks like out my back door.
That's a little more convincing. We're at TCCOR 1. The storm should be here in a few hours.
Monday, August 30, 2010
There's a typhoon coming?
JR and I lived in Lejeune for 4 years. We had some storms go by us, but we were never really close to any. We've lived here and barely had any storms at all, much less major ones. Last night when I got on Facebook I saw 6 or 7 posts from people on the island stating that we were at TCCOR 3, which means there will be winds of 50 knots or greater within the next 48 hours. That means there's a storm a'comin'. This morning I checked the Kadena weather website, and it said we were at TCCOR 2 (winds of 50+ knots within 24 hours). I went out the back door, and what did I see? This.
It doesn't look like there's a storm coming, does it? I sure doesn't to me. A friend said it's always beautiful before a storm because it sucks up all the clouds. That makes sense. All I know is that if the commissary hadn't been so crazy this morning, I might not have believed it.
Triathletes
I've mentioned before that JR and Victor are training for a triathlon. Well, they've already done one. Now they've decided they'll do an Ironman before they leave the island. Again, I think they're crazy, but they'll never be convinced of that. Right now they're trying to convince the world to join them. Here's a pic of them in matching gear after they went for a perimeter ride on their bikes (around the outside of the entire base, approximately 16 miles by time they get home).
And more evidence that they're crazy... all they were talking about is how they weren't really tired yet and how they wanted to go do some more training. Weirdos.
Friday, August 27, 2010
Tank Cake
I made my third cake this week. This is by far the most complicated one so far. It was also my first paying customer. (Thanks, Grace!) I made it for the son of a friend from church. He's turning six and wanted a chocolate tank cake. Being the son of a Marine, I figured he needed a USMC tank. So the first thing I did was Google image search the M1 Abrams tank. I have a window full of tabs of tanks and tank cakes alike. Most of my inspiration came from this picture of a model.
I would have used a picture of an actual Abrams, but it was hard to see any detail in those pictures. The cake I made was Devils Food in three layers but with four pieces. First I used an 8.5 x 11 glass pan. I made two cakes in this pan. Then I got a glass 7 x 5 pan and cooked some more Devils Food cake in it. After they cooled I put the small one in the fridge (my fridge runs very cold). I then took it out and cut the front of it to resemble the top rotating part of the tank. The two large layers were stacked one right side up and another upside down on top with homemade green-tinted buttercream frosting (Note: olive drab is a very unappetizing color). I trimmed the sides to make the angles on the front and back a little more extreme. One of the pieces was "pasted" to the back of the top cake with more buttercream. I then coated the whole cake with buttercream so the fondant would stick to it.
I put the cake pieces in the fridge while I made the fondant. For this cake I had to dye the fondant. Again, I had to make it olive drab, a color I couldn't find here on the island. Instead, I melted some Ghiradelli chocolate baking bars I got at the commissary and kneaded it into the white fondant. Then I added some Wilton Juniper Green tint and kneaded again. I definitely got my workout for the day. Kneading fondant is hard work! I rolled some out and put it around the tank body.
After I fitted the fondant to the bottom piece I rolled out some more and put it around the top pieces. The fondant on the main part was cut at the bottom because I knew I would be moving the cake around. I had that cake set on a cake board that I trimmed to size. The small turret piece was not on a cake board so I cut the fondant a little to large and then folded it under. I wasn't worried to much about seams because the cake is a tank, which is made out of panels of metal. After wrapping and placing the top layer I got out my new gum paste tool set (Love new toys!!) and started designing the details. I rolled little pieces of fondant to make the wheels, the side panels above the wheels, the hatch, the tail lights, etc. I used the gum paste tools to draw in seams for other panels, between the plates on the track, the air exhaust vents on the back, etc.
The cannon was made by wrapping a pirouline in some more fondant. I covered the end that would show and shoved a lolipop stick into the other side to help anchor it into the cake. Next time I will find a better way to support it. I ended up sagging a little by the time the cake was served.
I brought the cake to the party early for final assembly. I put the tank on a large rectangular cake board and then melted some bakers chocolate and smeared it all over the bottom of the tank so it would look like it had driven through mud. Then I put a thin layer of frosting on the cake board and crumbled some of the extra cake over it to make dirt. Here's the final product. I think he liked it.
Sunday, August 22, 2010
The Princess Castle Cake
My second cake came just a week after my first. I had seen the Wilton castle cake set online so Issie was given the choice between that and Barbie doll cakes. She chose the castle. This cake was by far more complicated than any other I've done. It started with a 2-layer 9" strawberry cake and a 2-layer 6" strawberry cake. I covered them in white fondant. This was my first experience with fondant, and from what I'd read, I thought it worked like any dough that you roll out. It does, to an extent. What I didn't realize is that you can't just smooth pieces together when they tear. Oops. Yeah, that spot became the back of the cake where it wouldn't be as noticeable. Here's the pink cake with white fondant.
After I put the fondant on, I put the pieces together to try to figure out how I should construct the final cake. This was the pic I took with my phone and sent to JR for his advice.
The next step was to decorate all the pieces. The final assembly and decoration would take place at Victor and Melanie's house before the party. I got some piping gel for the window frames and door frames. I outlined the windows on the towers and stuck them in the fridge to set. Then, instead of just outlining the window and door on the main cake, I got a paintbrush I've used for candy-making and glazed them.
Just a note. Piping get does not set. It stays soft no matter what you do. I found this out after I took the towers back out and added the flowers to the window sills. If I ever make this cake again, I will be glazing all the windows. It looks much better than just outlining the frame.
The peaks that went on top of the towers were supposed to be "painted" too so I covered them in a thin layer of buttercream frosting and then sprinkled pink sugar.
All the pieces were then transported to the party to be put together. On the way, one of the towers rolled and smudged so I had to redo the layout of the castle. That's okay, though. I think it turned out better with one less tower. It was a bit crowded before. I put the cake on one of Melanie's cutting boards and attached the towers and peaks with melted white chocolate. To cover the tips of the peaks where I had held them, I put a little dollop of frosting with the star tip. I added more flowers and leaves to cover the seams and wrote Issie's name on the second layer. Here's the final result.
I'm very proud of it. Now I'm excited to try more. I'm making a cake for a friend's son's birthday party this coming Friday, but I don't know what it's going to look like yet. Then I'm going to make the cakes for Melanie's baby shower, whenever that will be. Hmmm. That's not enough. I need more people to need cakes. I want to make them, but I don't want them sitting around my house. Anyone need a cake decorated?
My first birthday cake
As I mentioned in the first post, I'm teaching myself how to decorate cakes. I've made and frosted cakes before, but I've never tried to make anything unusual or fancy. The most complicated thing I've done is a typical two-layer round cake. When Melanie was planning Zack and Issie's birthday parties I volunteered to make the cakes. Zack's cake was to be a Lego block. The inside is actually made up of 9 little cakes I made in pans I got at the 100 Yen store. It said they were pound cake pans. I made one batch of white cake batter and then divided it and dyed the portions different colors. Zane loved watching the batter turn colors.
Here are some of them after they came out of the oven. JR helped me decide how to stack them so the cake would be stable and look cool when you cut into it.
Then I dyed some buttercream frosting and stacked them together. The pegs on top are muffins that I cut flat on top and then flipped over and set on the cake.
This is what it looked like when we cut into it.
It turned out pretty well. The boys definitely enjoyed it. They were all asking for seconds and thirds.
Pumpkin Cheesecake in a Gingersnap Crust with Honey Ginger Whipped Cream
This isn't a new recipe, but I haven't made it in awhile and I've had to alter it. It's one of JR's favorites. The crust calls for ground hazelnuts. The only way I've seen to get hazelnuts in Okinawa is to pick them out of the variety nut bin that shows up around Christmastime. Frankly, I'm not doing that. I have a bag of almonds in the cabinet. JR doesn't like almonds, but I'm going to see how this works. I don't think the change will make too much of a difference. I'll be including the recipe of anything I make so people don't have to ask if they want it.
Pumpkin Cheese in a Gingersnap Crust (originally posted by Shelley on Allrecipes.com)
1 1/2 cups gingersnap cookie crumbs
3/4 cup ground hazelnuts
3 tablespoons brown sugar
6 tablespoons unsalted butter, melted
3 8-oz. packages cream cheese, softened
1 cup brown sugar
1 1/2 cups canned solid-pack pumpkin
1/2 cup heavy cream
1/3 cup maple sugar
1 tablespoon vanilla extract
3/4 teaspoon ground cinnamon
1/2 teaspoon ground allspice
4 eggs
1. Preheat oven to 325 degrees F. Grease and flour a 9-inch springform pan.
2. Using a fork combine gingersnaps, hazelnuts, brown sugar, and melted butter. Press mixture onto the bottom and two inches up the side of the pan to form a crust.
3. With an electric mixer beat cream cheese and brown sugar until light and fluffy. Stir in pumpkin. Mix in the cream, maple syrup, cinnamon, allspice, and vanilla. Beat in the eggs, one at a time, mixing until smooth.
4. Pour batter into prepared crust. Bake in the preheated oven for 90 minutes or until the center of the cheesecake is set. Allow to cool in pan for 30 minutes. Refrigerate overnight.
I almost forgot to make the whipped cream. JR wouldn't have let me, though. I think that's his favorite part. I found this on Allrecipes.com too, but it's not a recipe by itself. It's attached to the Pilgrim Pumpkin Pie recipe.
Honey Ginger Cream (originally posted by Fern on Allrecipes.com)
2 cups heavy whipping cream
1/4 cup honey
1/2 teaspoon ginger
In large bowl combine cream, honey, and ginger. Whip until soft peaks form. Chill one hour before serving.
Subscribe to:
Posts (Atom)